rust-animation is an OpenGL based graphics library for creating hardware-accelerated user interfaces written in Rust. It is designed to implement a simple animated UI for embedded devices.
Note: this project is in early development stage so many features are still missing, some dependencies are experimental, and there are probably many bugs. Feel free to file any bugs.
rust-animation is written in Rust so you need to install Rust: * https://www.rust-lang.org/tools/install
If you build rust-animation in Windows, you have to install cmake first.
Note: rust-animation is tested in Ubuntu 20.04, Windows10, and Mac OSX.
There are several examples so you can build them as follows:
``` $ cargo build --example ani $ target/debug/examples/ani
``` This examples shows the basic animation features.
``` let mut play = Play::new("Animation test".tostring()); play.initialize(); let mut stage = Stage::new("stage".tostring(), 1920, 1080, LayoutMode::UserDefine, None); stage.set_visible(true);
let mut actor = Actor::new("actor1".tostring(), 400, 225, None); actor.x = 100; actor.y = 100; actor.setimage("examples/splash.png".tostring());
// 1X -> 2X for 5 sec. let time = 5.0; actor.applyscaleanimation(1.0, 2.0, time, EasingFunction::Linear); actor.applytranslationxanimation(100, 1000, time, EasingFunction::EaseInOut); actor.applytranslationyanimation(100, 300, time, EasingFunction::EaseInOut); actor.applyrotationanimation(0, 360, time, EasingFunction::EaseInOut);
let mut actor2 = Play::newactor("actor2".tostring(), 120, 120, None); actor2.x = 100; actor2.y = 100; actor2.scalex = 1.5; actor2.scaley = 1.5; actor2.setcolor(0.0, 0.0, 1.0); // 0 degree -> 360 degree for 5 sec actor2.applyrotation_animation(0, 360, 5.0, EasingFunction::EaseInOut);
let mut actor3 = Play::newactor("actor3".tostring(), 50, 50, None); actor3.x = 10; actor3.y = 10; actor3.setcolor(1.0, 0.0, 0.0); actor2.addsubactor(actor3);
stage.addactor(actor); stage.addactor(actor2); play.addstage(stage);
while !window.shouldclose() { processevents(&mut window, &events); play.render(); window.swapbuffers(); glfw.pollevents(); } } ```
You can see all the easing functions in this example.
$ target/debug/examples/easing_functions
$ cargo build --example easing_functions
```
let mut play = Play::new("Easing functions demo".tostring());
play.initialize();
let mut stage = Stage::new("stage".tostring(), 1920, 1080,
LayoutMode::UserDefine, None);
stage.set_visible(true);
let easingfunctions = vec![ EasingFunction::EaseIn, EasingFunction::EaseInCubic, EasingFunction::EaseInOut, EasingFunction::EaseInOutCubic, EasingFunction::EaseInOutQuad, EasingFunction::EaseInOutQuart, EasingFunction::EaseInOutQuint, EasingFunction::EaseInQuad, EasingFunction::EaseInQuart, EasingFunction::EaseInQuint, EasingFunction::EaseOut, EasingFunction::EaseOutCubic, EasingFunction::EaseOutQuad, EasingFunction::EaseOutQuart, EasingFunction::EaseOutQuint, EasingFunction::Linear, EasingFunction::Step ]; let mut y = 0; let time = 5.0; let width = 63; let height = width; for i in 0..17 { let actorname = format!("actor{}", i+1); let mut actor = Actor::new(actorname.tostring(), width, height, None); actor.x = 0; actor.y = y; y += height as i32; actor.setcolor(i as f32 / 18.0, i as f32 / 18.0, i as f32 / 18.0); actor.applytranslationxanimation(0, (1920 - width) as i32, time, easingfunctions[i]); actor.applyrotationanimation(0, 360, time, EasingFunction::Linear); stage.addactor(actor); } play.addstage(stage);
while !window.shouldclose() { processevents(&mut window, &events); play.render(); window.swapbuffers(); glfw.pollevents(); } } ```
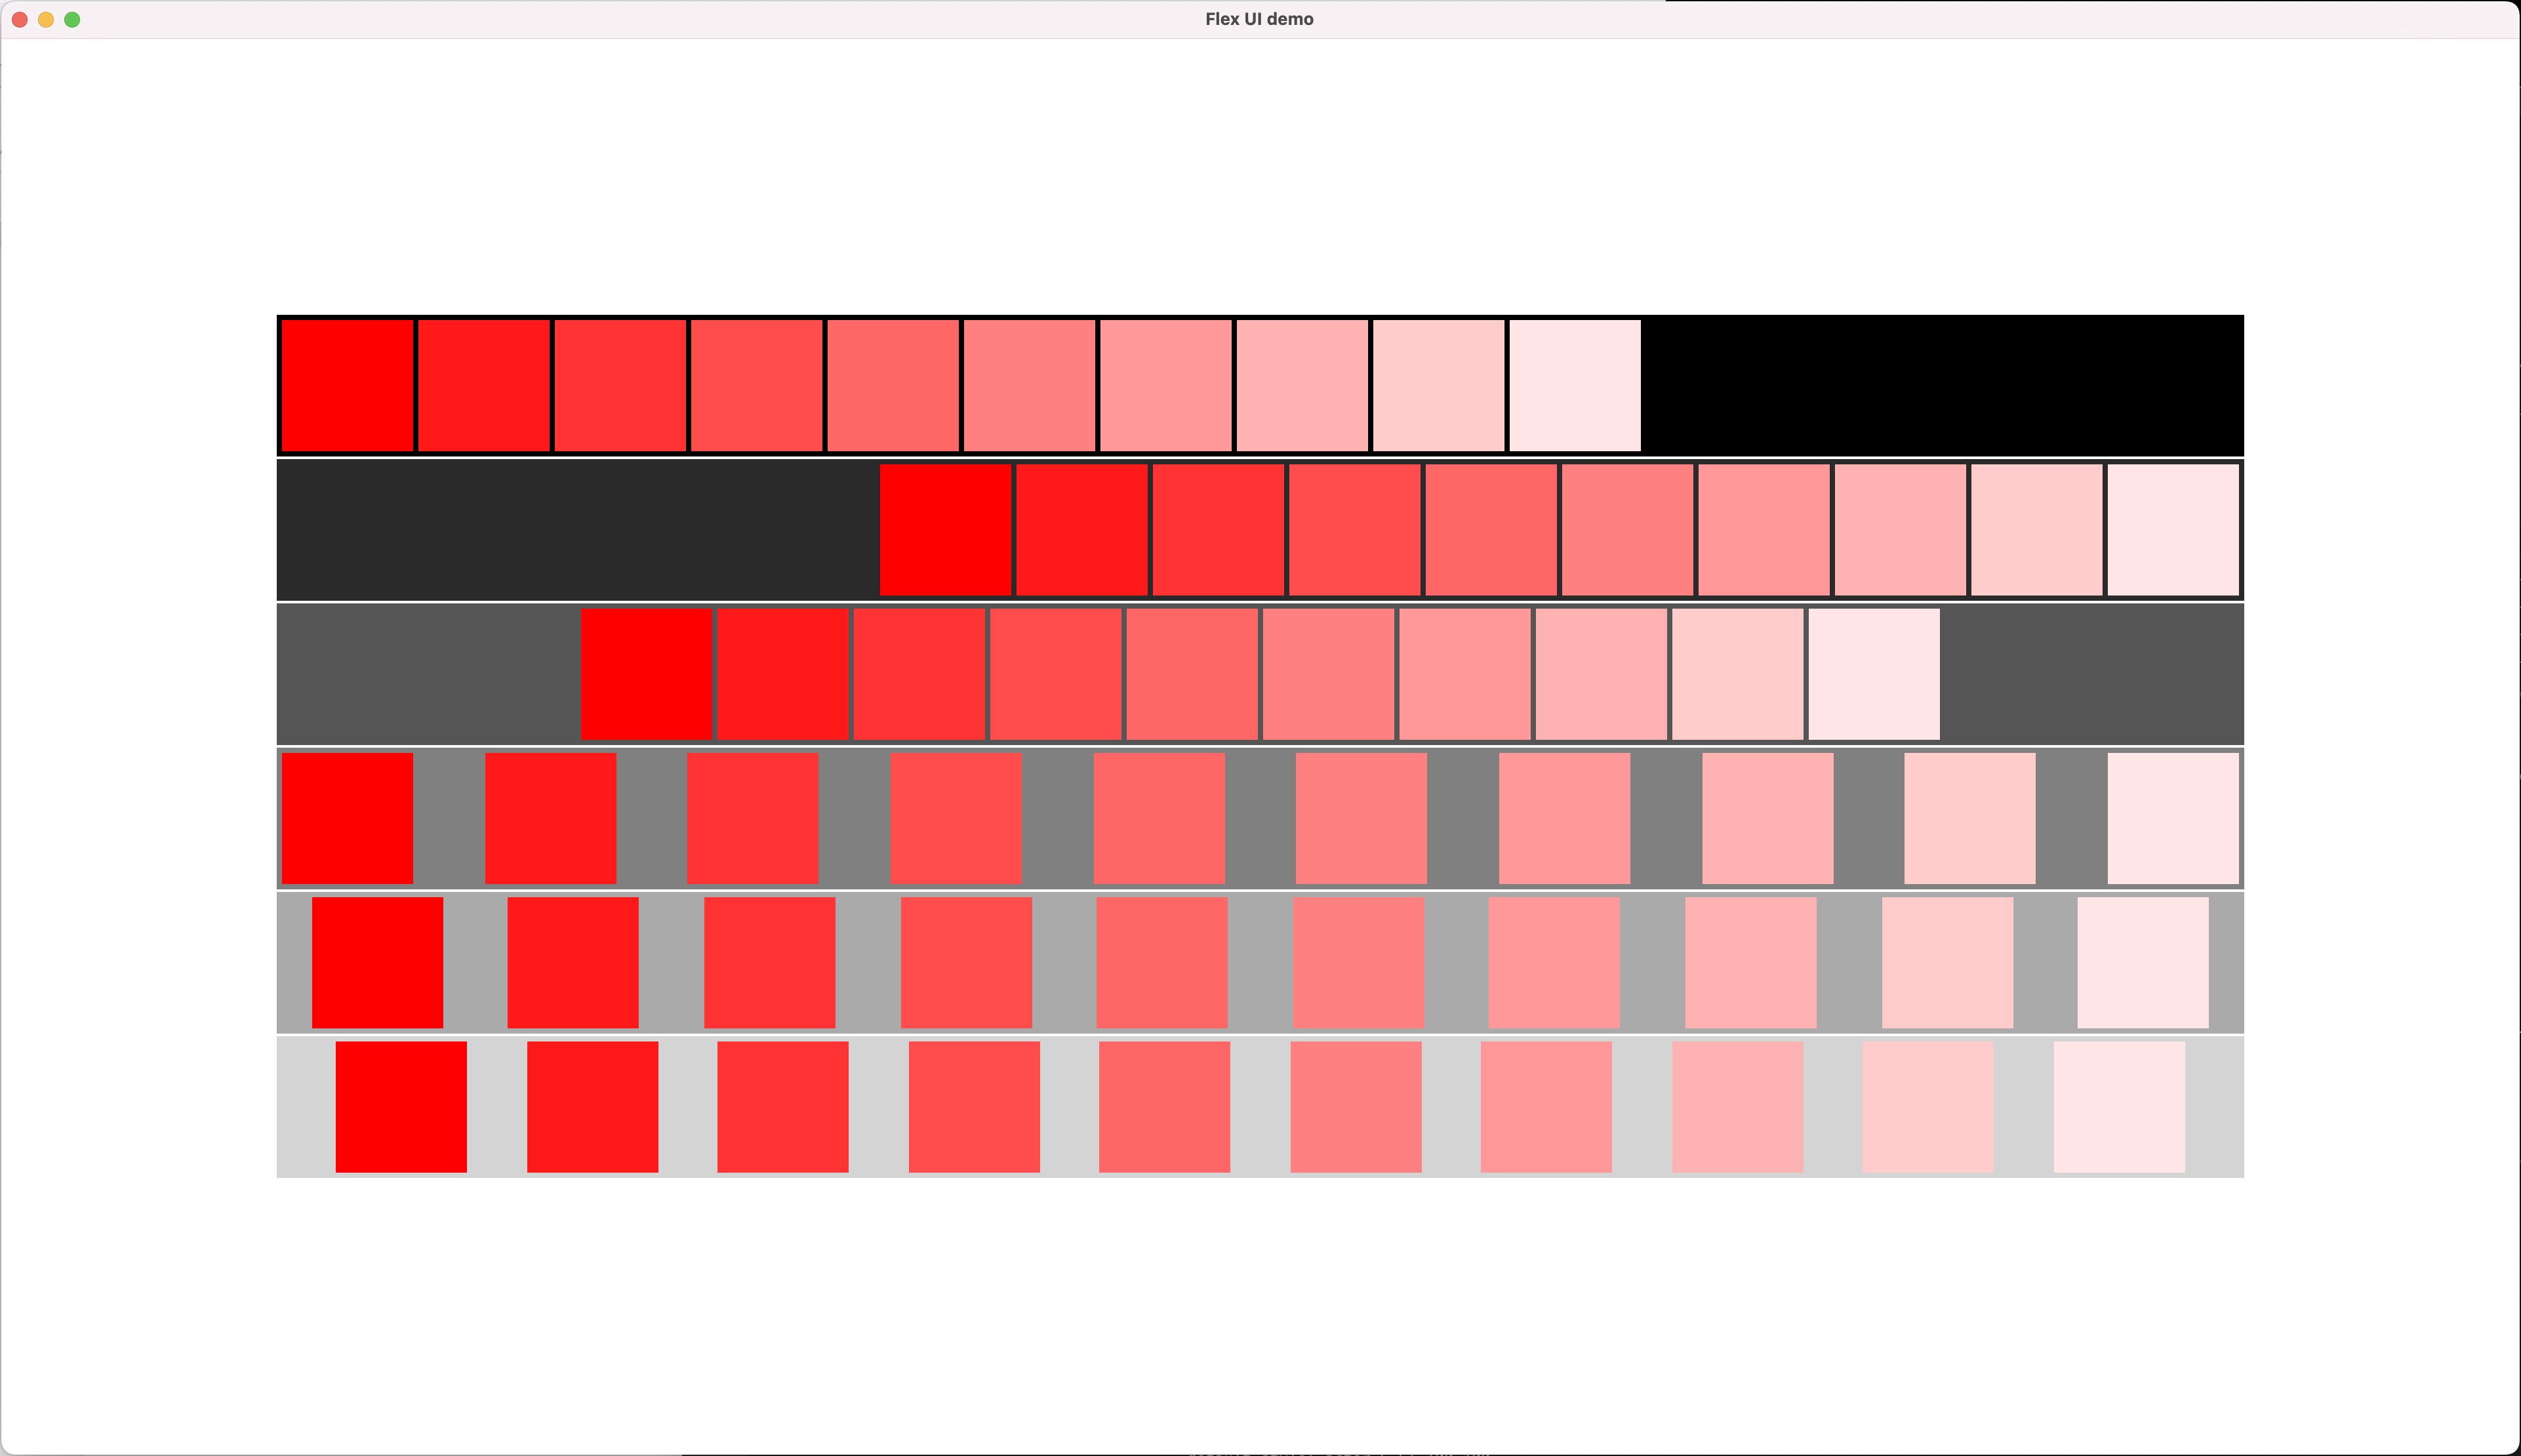 rust-animation experimentally uses Stretch to support Flex UI. You can apply a Stretch style to a stage or an actor. You can also implement your own layout using a Layout trait.
$ target/debug/examples/flex_ui
$ cargo build --example flex_ui
``` let mut stage = Stage::new("stage".tostring(), 1920, 1080, LayoutMode::Flex, None); stage.setstyle(Style { size: Size { width: Dimension::Points(1920.0), height: Dimension::Points(1080.0), }, justifycontent: JustifyContent::Center, flexdirection: FlexDirection::Column, alignitems: AlignItems::Center, margin: Rect { start: Dimension::Points(1.0), end: Dimension::Points(1.0), top: Dimension::Points(1.0), bottom: Dimension::Points(1.0), ..Default::default() }, ..Default::default() } ); stage.setvisible(true);
let justifycontent = vec![ JustifyContent::FlexStart, JustifyContent::FlexEnd, JustifyContent::Center, JustifyContent::SpaceBetween, JustifyContent::SpaceAround, JustifyContent::SpaceEvenly, ]; let width = 1500; let height = 108; for i in 0..6 { let actorname = format!("actor{}", i+1); let mut actor = Actor::new(actorname.tostring(), width, height, None); actor.setcolor(i as f32 / 6.0, i as f32 / 6.0, i as f32 / 6.0); actor.setstyle(Style { size: Size { width: Dimension::Points(width as f32), height: Dimension::Points(height as f32), }, justifycontent: justifycontent[i], alignitems: AlignItems::Center, margin: Rect { start: Dimension::Points(1.0), end: Dimension::Points(1.0), top: Dimension::Points(1.0), bottom: Dimension::Points(1.0), ..Default::default() }, padding: Rect { start: Dimension::Points(2.0), end: Dimension::Points(2.0), ..Default::default() }, ..Default::default() } ); for j in 0..10 { let mut subactor = Actor::new(format!("actor{}{}", i+1, j+1).tostring(), 100, 100, None); subactor.setcolor(1.0, j as f32 / 10.0, j as f32 / 10.0); actor.addsubactor(subactor); } stage.addactor(actor); } ```
This example is still work in progress. The thumbnail view only works.
$ target/debug/examples/picture_viewer
$ cargo build --example picture_viewer