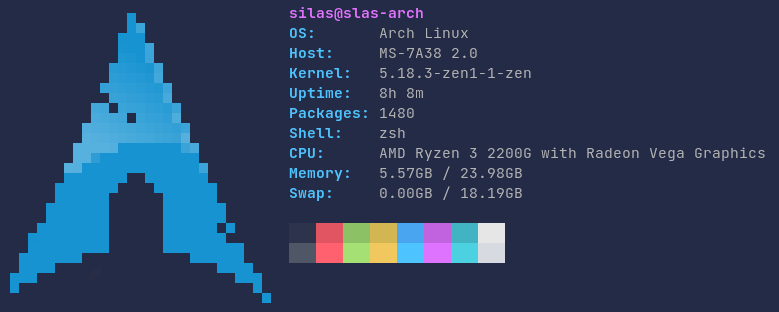

Another fetch program with pixelized images written in Rust
pixfetch can be configured using a config file in $XDG_CONFIG_HOME/pixfetch/config.toml or when $XDG_CONFIG_HOME is not set in $HOME/.config/pixfetch/config.toml. To see all options you can have a look at the default configuration file.
Additionally, all configuration can also be overridden with flags from the command line. To see those options run pixfetch --help or pixfetch -h for shorter descriptions.
On Arch Linux pixfetch can be installed through the AUR with a helper like paru or yay:
bash
paru -S pixfetch
In case you do not need the man page and shell completion scripts you can also install pixfetch through cargo:
bash
cargo install pixfetch
You can set these variables beforehand to be able to just copy below commands (edit the values accordingly):
bash
version=1.0.0
platform=x86_64-unknown-linux-musl
Download the latest release for your platform from the releases page. In case there is no suitable download option for you, please open an issue:
bash
wget https://github.com/RubixDev/pixfetch/releases/download/v$version/pixfetch-$version-$platform.tar.gz
bash
tar -xvf pixfetch-$version-$platform.tar.gz
and open the directory:
bash
cd pixfetch-$version-$platform
bash
sudo install -Dm755 pixfetch /usr/bin/pixfetch
sudo install -Dm644 README.md /usr/share/doc/pixfetch/README.md
sudo install -Dm644 LICENSE /usr/share/licenses/pixfetch/LICENSE
sudo install -Dm644 doc/pixfetch.1.gz /usr/share/man/man1/pixfetch.1.gz
sudo install -Dm644 completion/_pixfetch /usr/share/zsh/site-functions/_pixfetch
sudo install -Dm644 completion/pixfetch.bash /usr/share/bash-completion/completions/pixfetch
sudo install -Dm644 completion/pixfetch.fish /usr/share/fish/vendor_completions.d/pixfetch.fish
Note: For bash completion make sure you have
bash-completioninstalled
bash
git clone https://github.com/RubixDev/pixfetch.git
bash
cargo build --release
bash
sudo install -Dm755 "${CARGO_TARGET_DIR:-target}/release/pixfetch" /usr/bin/pixfetch
sudo install -Dm644 README.md /usr/share/doc/pixfetch/README.md
sudo install -Dm644 LICENSE /usr/share/licenses/pixfetch/LICENSE
This is where the generated man page and shell completion scripts are located. The location of that folder was logged while building the binary. Alternatively you can use following command:
bash
find "${CARGO_TARGET_DIR:-target}/release" -name pixfetch.1 -print0 | xargs -0 ls -t | head -n1 | xargs dirname
You can then open that directory using cd.
bash
gzip pixfetch.1
sudo install -Dm644 pixfetch.1.gz /usr/share/man/man1/pixfetch.1.gz
sudo install -Dm644 _pixfetch /usr/share/zsh/site-functions/_pixfetch
sudo install -Dm644 pixfetch.bash /usr/share/bash-completion/completions/pixfetch
sudo install -Dm644 pixfetch.fish /usr/share/fish/vendor_completions.d/pixfetch.fish
Note: For bash completion make sure you have
bash-completioninstalled